My #1 Must Have!!!

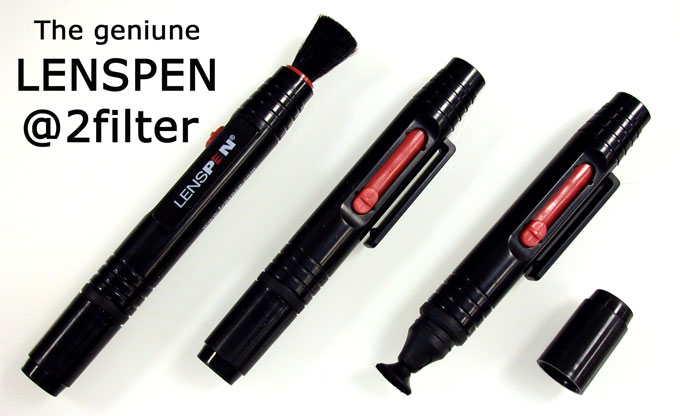
I recently ordered a lenspen from amazon and it arrived this past weekend. Up until I got this item I have been cleaning my lenses and such with a microfiber cloth- eeeek!!! It worked okay but i was starting to notice that it was just moving the dirt around the lens and creating tiny scratches- enter the lenspen!! 

This thing is AMAZING!!! It was only like $6 on amazon.com (they have them at Swanlunds if you wanna go local but its around $20 there) and arrived within a week of placing the order. Looks fancy huh? Well, its not really but let me tell you how it works:

Step 1- that brush on the end is retractable into the barrel- simply push it out and wipe all your glass
Step 2- the other end is a microfiber covered suction cup (oooh yeah!!) after the brush clears the dirt use this in small circular motions to clean your smudges... 
Step 3- VOILA!! Clean, clear, and gorgeous lenses free of all dust, oils and particles!!

At only $6 this thing is a life (& lens) saver!!! 

Design Work

We have now hosted 5 arts arcata events since we have been open. These events are great and we have been getting a larger and larger turnout for them every time. This is great and all but it does lead to more problems like stolen merchandise, plastic cups littering the road, and gaggles of people in the stock room smoking out (most of whom I have never seen before). So I decided it's time to crack down (especially since the upcoming arts arcata is somewhat of a sensitive matter- local graff artists I'm sure the pd will be interested in).

It took me a while to think about how to go about this & it finally just hit me- pow- right in the kisser (not really, but I almost never get to say that!). BACKSTAGE/VIP PASSES!!! Dooi- how could I not have thought about that for 2 whole weeks? So I googled the dimensions (2.6x4.7) and went to work in Photoshop.

I knew that the passes had to have the store name & logo along with our clothing lines logo's but that was just the easy part... The pass started off saying MEMBER but I thought that would just encourage the idea that we are a dispensary (FYI- we are not!) so I changed it to STAFF. I also knew that I wanted red on the pass so I picked a red as close to our T-shirts as possible.

The background was the final step. I played around with solid color background but they just didn't give me the pop/professional look I wanted. So I started working with pics I normally use for textures & was going to layer the textures with a solid background. Once I tried a metal countertop image the deal was sealed.

The passes were starting to look like large dog tags- Not my intention but still pretty cool! However the text and logo's still looked flat and dull. Suddenly I remembered my Photoshop video's and thought of the layer properties box. I started playing around with the embossing feature and settled with pillow embossing. I was amazed- it was just what the passes needed & the logo's and text stood out like it had been stamped on the metal. They are being printed and laminated as I type this.

Pretty good for my first try at actually designing something pro-fession-al looking, although I'm sure in about 6 months I'll look back at them and go- "ew- what was I thinking, that is so amataur looking" but for now I LOVE them!!

I went in and added a "do not duplicate" watermark on the one I was posting online so that it couldn't be downloaded and printed by just anyone... Now I just have to find about 10-20 black cheapo lanyards & we are in biz-nazz...

DTA STAFF PASS

Experimenting with Motion Blur

I have been seeing a ton of motion blur images on flickr lately & decided to give the technique a try. I didn't expect much considering I had never tried this before and my hands are anything but steady however after looking through the images I was fairly surprised. 

What is Motion Blur? According to Wikipedia Motion blur is the apparent streaking of rapidly moving objects in a still image or a sequence of images such as a movie or animation. It results when the image being recorded changes during the recording of a single frame, either due to rapid movement or long exposure. (click on this posts title to link to a great DPS tutorial on this technique).

What did I do? First off, I had to find a subject, which is not all that easy in an office setting! I saw my new valentines orchid on my way back into my office and thought that would be the perfect subject- I really wanted a pic of the orchid but I have orchid pics & wanted something unique and different this time. I set my camera to manual (because I also wanted to see what bokeh my lens would get at f/11- the supposed perfect aperature) & played with the times as I went... 


f/11 @ 1.3 seconds

This one was one of my first tries... Not very pretty to look at, it's just generally blurry as my hands were a bit shaky and moving up/down/left/right... So I tried to steady myself on the edge of my chair and decided to try short tight movements to the side instead...


f/11 @ 1.3 seconds

Getting there- I really like the dreaminess of the flower in this photo but I wanted it to be a little more defined also (how's that for an oxymoron?). My hands were getting steadier though- evidenced by the lines going to the right (pretty straight huh?) So I decided to try holding the camera still for a brief second, then panning to the right & shortened my shutter speed to 1/2 a second just to see what I came up with... 


f/11 @ 1/2 second

This one is just okay... I definitely got the flowers to be more defined but I lost quite a bit of detail in them as well due to the amount of motion blur. My hands are getting steadier and steadier but I just panned too much in this. Plus the background had too much going on with the file cabinet off to the left... 


f/11 @ .8 seconds

This one is a hot mess... Increasing the shutter speed to .8 seconds instead of .5 did not seem the way to go...   Add that to the fact that my hands/arms were getting kinda shaky & tired = a hot mess of blur. So I tried going back to my beginning settings and lowered them just a tad (from 1.3 sec. to 1 sec.)...


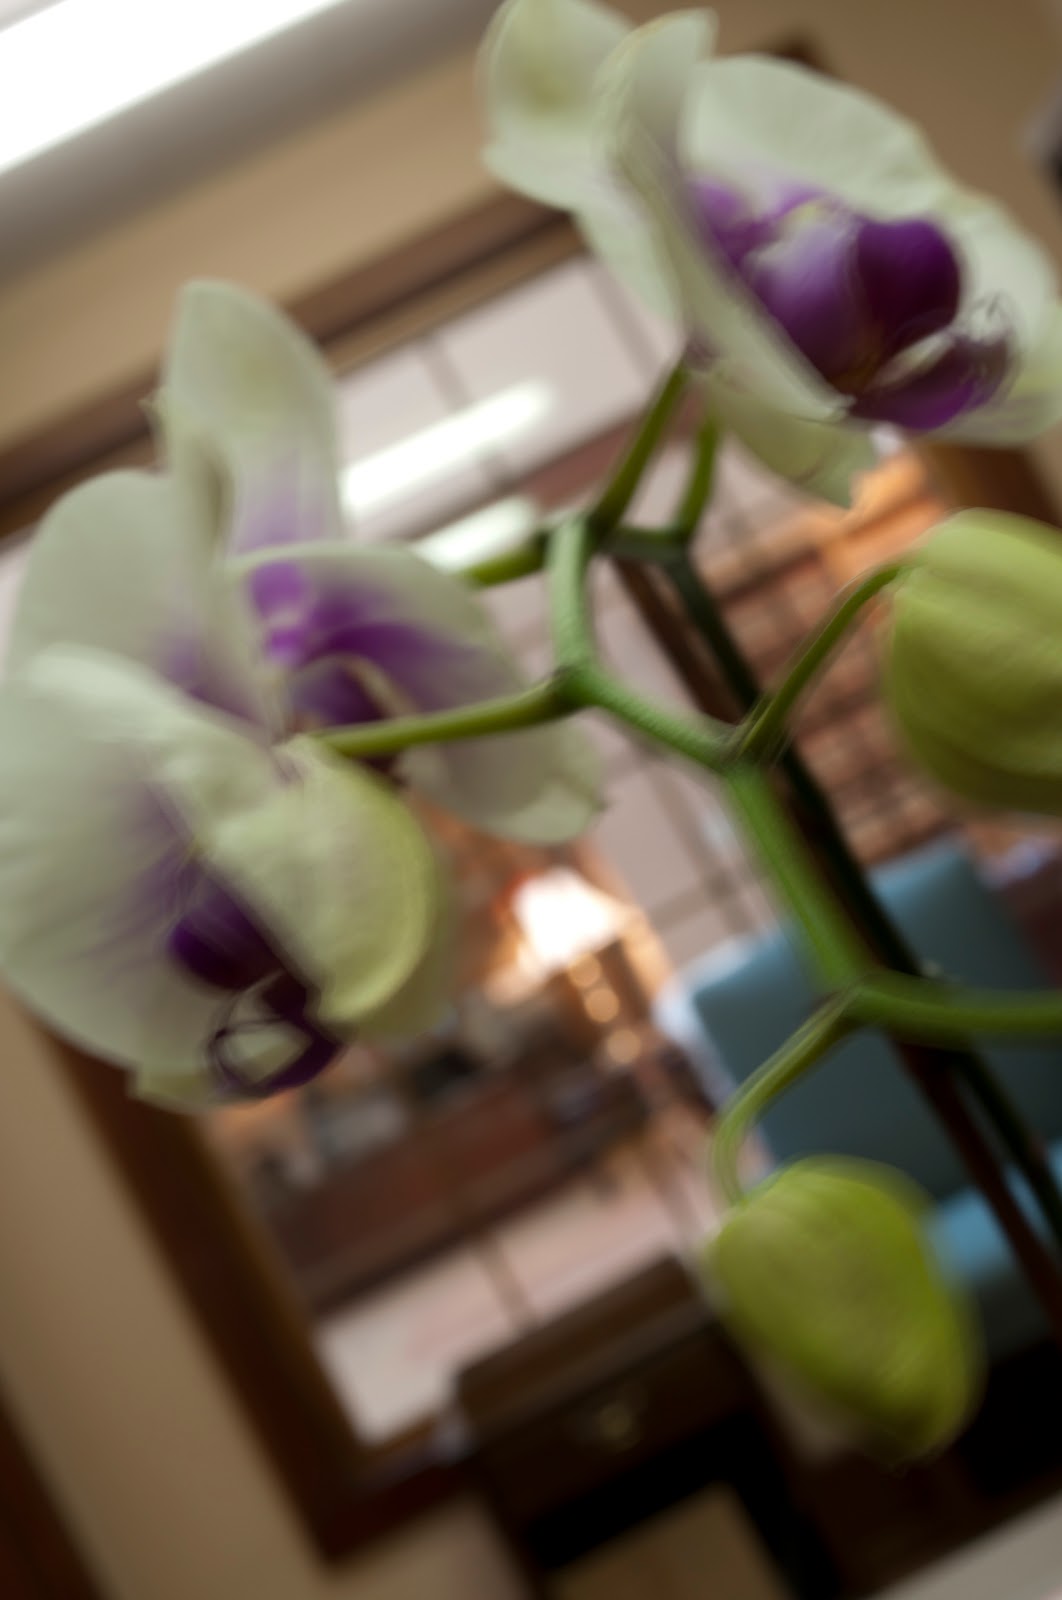
f/11 @ 1 second

FINALLY!! I got exactly what I wanted!! The perfect amount of blur, detail, bokeh, and dreaminess. I tried to hold my hands very still for this image and probably went through at least 10 before this one which were almost perfect but some were a little too blurry or too solid or had too much motion. I just stuck with it and knew that it would work once my hands relaxed and I had time to practice... I went into Camera Raw & edited this image, mostly working on the white balance as the fluorescents made everything kinda crazy looking.  I also added a white border around this image.... 


I am definitely going be to be trying motion blur more and more using different subjects. There's just something fun and slightly exciting about breaking a rule I almost live by when photographic things (ie NEVER move the camera)!!!


Location: My office- Eureka, CA
Date/Time: 2/25/11 @ lunch
Subject(s): Orchid- Motion Blur
Notes: handheld-- panning left in some images & right in others-- edited in Camera Raw

The Pioneer Woman Actions

Who doesn't LOVE actions for photoshop?!! I recently downloaded The Pioneer Woman's action sets (1 & 2) from her blog (for link click on title to this post) and started playing around with them. All I can say is WOW~! Her actions are spot on- the seventies action reminded me of my family's old pics & the vintage action actually makes the image look like it really was taken with an old camera.

What is an action? Basically, it's a saved file for Photoshop which contains multiple editing steps- these are different for each action depending on the look the action is going for. So if I like alot my photos to be sharpened +10 and lightened +5 I can set up Photoshop to record the steps I take to get that and then it compresses it all into one file, saved in my actions tab. This file can then be used on any image with just one click, instead of having to adjust sharpness and lightness individually for each image. BRILLIANT!! It saves me time and quite a bit of hassle. Even better is that after each action finishes it shows up as a layer (or depending on the action multiple layers) which can then be further adjusted (ie opacity, fill, or blending mode, just to name a few) to make the image pop. You can save your own actions or you can download them from the net. These Pioneer Woman actions are the best I have come across yet & I was thoroughly impressed- she should be charging for these!!

If you use photoshop I would highly recommend taking a look at her site in general- topics range from momhood to cooking to photography. She has some great tips and tutorials in addition to her rockin actions...


ORIGINAL IMAGE #1 (the famous Carson Mansion in Eureka, CA-- built 1884-1886):


THE PIONEER WOMAN ACTION'S ON IMAGE #1:


Action Used: SEVENTIES


Action Used: DIM THE LIGHTS with OLD WEST


Action Used: VINTAGE


Action Used: LOVELY & ETHEREAL with SOFT & FADED (deleted light layer)


ORIGINAL IMAGE #2 (my lovely friend and model for the day)


MY OLD EDIT OF IMAGE #2:


THE PIONEER WOMAN ACTION'S ON IMAGE #2:


Action Used:  VINTAGE


Action Used: QUICK EDGE BURN with BOOST


Action Used: HEARTLAND


I said they were amazing actions (& free to boot!)- was I right or what??!!

Fun Photo Projects

My boss is going to be out most of this week so I am browsing the net for fun photo projects I want to try-(when I actually have time to dedicate to something other than work)...

Family Tree's
      I have never really been interested in any family tree/history type stuff- until I moved away from home & that info and the memories are not so readily available. I would love to have something around my house reminding my everyday of my loved ones & the great times we've had, & pictures are just too boring & plain jane for me!!


I LOVE this!! I can't really think of any heirlooms or keepsakes that I have around so I would probably have to get some sent to me... This does worry me though because it is so easy for someone to just pickup and steal and with so many sentimental items inside it is slightly terrifying... Maybe I need a more secure house before I try this.... 


I really like this- it's simple, clean & modern looking. However I rent so I would have to put this on a large canvas or painted wood or something--OOO, maybe even a large mirror or on top of some chalkboard paint... 


Print Items
      
Personalized Postcards -- Martha Stewart
I have been wanting to make my own postcards for the longest time. However it is way too time consuming for me to create my own template for it- afterall isn't that what Martha Stewart is for??


Pet Stationary -- Martha Stewart
So obviously this project doesn't have to be pets, but I would ADORE some blank notecards with my poochie on the front!!! The bold graphic look is great too!!


Fridge Fun Magnets -- Parents Magazine
This isn't just for kids- I would love this as well!!! Great for regular magnets or for fun stress relieving.... 


Temporary Tattoo Designs -- Martha Stewart
I actually needed this template/instructions last Friday. I got all dolled up for a pin-up party & some realistic tats would have been great. Martha gives a downloadable clip art designs you can print on tattoo paper (av. at a scrapping store), but I would love to try using some cut-outs from my own images also... 


House & Home

Photo Transfer Tote Bag -- Martha Stewart
I have been wanting to make one of these for the longest time-- Well, actually more like ten of these... I need one for the river, one for the dog, one for work, one for the truck, I think you get the idea... 


Photo Cubes -- Martha Stewart
I always need bookends, & I love the idea of using my own images in such a dimensional multi-purpose design. Idea- make these out of transparent or semi-transparent plastic & stick a light in the bottom for nice personalized mood lighting... 


Picture Pillow -- Martha Stewart
Who doesn't need more throw pillows!! I can already think of quite a few photos that would look great on my sofa & bed-- Also at the shop at work... 


Photo Plates -- Martha Stewart
This project brings back great memories.... My grandmother used to cater so she had alot of old dishes around. I grabbed a set of four plates one year & used paint pens on them to create my mom personalized snowflake dishes for x-mas... This is like the grown-up version.... =)


Photo Lanterns-VIDEO- DIY Network
These are great- I could see myself making these with texture photos as well as flowers, landcapes, etc... However the lanterns in the video are paper & look like they wouldn't last long so I would probably use paper over a heavier open base like plastic piping or wooden dowels... 


Paint A Wall Mural -- Apartment Therapy
I have been wanting a wall mural for the longest time but I rent so it's probably not the best idea to put something permanent and personal like that up. I would probably use a large piece of plywood or multiple smaller pieces to make the piece look more artsy (that would be easier to move and each piece could be spaced). This could also be done with a photo instead of the Illustrator graphic- I would just go into Photoshop and use the photocopy filter on my image (adjusted to show the details you do & don't want in the mural) and then print the image on transparent paper. Just a suggestion- If you use a photo it's probably easier to do Black & White instead of color... 


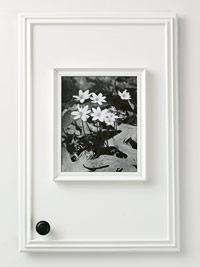
Photo Finish Cabinets -- Better Homes & Gardens
This would be really cool for remodeling a kitchen but I would probably use this more as a framing device since I rent & cabinet doors are cheap and easy to find.... 

DTA- It's What's for Christmas


LDecided to take a few pics to show off my hard work after getting the shop ready for the Christmas shopping season! Enjoy:


Location: DTA Humboldt- 1063 H Street Arcata, CA
Date/Time:
Subject(s): Christmas tree, decorations, logo's
Notes:

It's a Carson Mansion Christmas!!

Finally some Christmas lights!! The Carson house has been haunting my photographic dreams ever since they put the lights up on it. Problem is, the only free time I have had to shoot it has been while it was raining and my camera is not exactly waterproof...  Well, the rain finally cleared up a few nights ago (at least for the night) and I saw the lights on my way home over the Samoa bridge & jumped at the opportunity.

I have been reading up on HDR and looking at examples online for quite some time & thought that the Carson Mansion would provide the perfect subject for an HDR photo, especially with the Christmas lights all strung up. So I grabbed my tripod out of the car, and my cross-screen filter (makes lights have four points) just for fun, and set up everything from 2-3 different locations in front of the house and to the side of it. I used my Exposure bracketing feature on the camera taking three pictures each time I pressed the shutter button (the first at my set exposure, the second a stop below, and the third a stop above) and planned to combine them later in Photoshop using the automate HDR feature. Below are each of the three images before editing:


I was surprised at how easy it was! However what was not easy was trying to get the picture to look as close to real life as possible. I got close enough to make me happy for my first attempt, but I might try coming back and doing it over again after I get a bit more familiar with the ins and outs of the feature. Personally, I think it looks a little Tron-ish but I did watch the new movie the day before I took the photo's so I'm sure that didn't help! By the way, GREAT movie- I really enjoyed the first one but the second was even better! Back to business- Below are the combined photos, which were then edited in the HDR feature of Photoshop:


I used the corss-screen filter for a few shots before I noticed that the four-points it was making around the lights were much larger and pronounced than I wanted. So I remembered my focus-stacking technique and used it here. I took one pic of the house with the cross-screen filter:


and one without the cross-screen filter:


 and then combined them as partially transparent layers in Photoshop. By making them transparent layers I could control the power of the four-points coming off the lights.


Location:  Carson House Mansion-- at the foot of M Street in Eureka, CA
Date/Time: 12/ /10
Subject(s): Long exposure, christmas lights, HDR, architecture
Notes: some photos used a cross-screen filter, others no filter, all taken with tripod and long shutter speeds

The benefits of RAW

The more I shoot RAW images the more I love them. That's all for today!

No really, RAW images are the creme brulee of images... Our last few days in GA we went over to a friends house to hang out and the guys ended up re-hashing old times with some flaming irish car bombs. Of course, I was enlisted to photograph this glorious event, all the while thinking "I'm not so sure this is a good idea..."

The kitchen was the only place irish car bombs could be had without catching the carpet on fire or burning his gorgeous hardwood floors. Problem with that was that the kitchen was really dark- on top of that once I did a few test shots (with the camera- not the car bombs!!) I realized that if I wanted to catch the fire coming off the glasses I would need to make the kitchen even darker. Was I worried? HELLS NO!! Why- because I was shooting RAW!!! I just set my shutter speed around 1/60 which made it low enough to just barely make out what would be in the image and set my camera for continuous shutter release.

Of course, the images were too dark to see much of anything in:


However I just opened each one in camera raw and edited them as a batch to lighten them up and keep the fire showing. I mostly tinkered with the exposure, fill light (which I normally try not to use because of the noise), brightness, and white balance. BIM BAM BOP- a few minutes later (okay, maybe like 20) I had the pictures I wanted from the beginning!


Location: Inside, very dark lighting
Subject(s): Irish Car Bombs, flame, people
Notes: shot in RAW, edited in Camera RAW & Photoshop

Thanksgiving

Thanksgiving brings back memories of tables and counter-tops crammed with every food imaginable. I remember how hectic thanksgiving always was trying to make it to everyone's dinners/lunches, which between my dad & step-mom's family, grandma's family, grandpa's family, step-dad's family, and boyfriends family left me pooped everytime. So this year since we were in town for the big headache and belly-ache inducing day we decided to gather everyone together at one house for one dinner. Sounds crazy right? Well, we survived, scratch that- we rocked that thanksgiving.

With all the people around and the different families my goal for the day was to get group shot to give to each of the families, as well as a few random candid shots. Last year I spent quite a bit of time shooting the food so I wanted to focus on the people this year, since I only get to see them once a year!

I shot everything in RAW instead of JPG (now that I have photoshop & camera raw I will never go back to jpg's!!) and then did some short (ie- 5-10 min per picture) editing in camera raw then photoshop to finish them up with the border.


After thanksgiving we went skeet shooting- my first time- where I shot a shotgun- also my first time- AND I actually hit a few skeets! By a few I mean like three out of at least 20-30, but that seems okay for a first-timer. It was really cold and windy out so I didn't take too many pics (expensive camera + freezing fingers + muddy hills & lakes= IMPENDING DOOM) but I tried to focus on getting images where the shooter and the skeet were both in the frame, and hoped I could get a few shots of the skeet being hit and breaking. I didn't have much faith in the later as I left my polarizing filter at the house and the reflection off the lake was killer.

Perfect Shot!!

DTA Skeet Skeet


Location: Lagrange, GA
Date/Time: 11/25/10
Subject(s): group shots
Notes: shot in RAW, minor editing

Atlanta: Scout it Out...

Georgia on my mind.... 

I am getting ready to go back home to visit family & friends in a few weeks- YAY!!! So I decided to look through my pics from the last visit & was horrified to see I only took 20 pics the entire week and a half we were there!! How did that happen? I have maybe four or five nice shots of family but everything else was crap... 
Not this time around!
I decided to scout out a few locations- don't laugh, just b/c I'm from the land of peaches & cream doesn't mean I can't act like a tourist when I want! I am scouring the net, mostly Flickr & Panoramio to find locations that I wouldn't  normally think of or that I have no idea even exists. Atlanta is a big place, and I only lived in the city proper for 4 years, hardly long enough to know it all! 

LOCATIONS
1. The Swan House -- Buckhead 130 W. Paces Ferry-- Gorgeous italian style mansion & gardens
           Ideal Subjects: architecture, english gardens, history, perspectives, HDR, fall plants & leaves
"Croquet, Anyone" by Atlanta History Center
http://www.flickr.com/photos/atlantahistorycenter/4721084238/

2. Piedmont Park -- Midtown Atlanta -- never bothered to take pics here for some reason- it has a sweet view!
          Ideal Subjects: skyline, night skyline, HDR, landscapes
"Midtown From Piedmont Park" by Adam Preble
http://www.flickr.com/photos/preble/59079707/ 
3. Old Town Griffin -- Subjects: architecture, buildings, HDR, 

4. Sundial/Westin -- Downtown Atlanta -- $5 gets u to the top of the Westin for a 360 panoramic view

5. 17th St. / SCAD/ Jackson St. Bridge -- Midtown -- Subjects: long exposure, cityscape, night cityscape
         ** FYI: found info. on flickr that Atlantic Station & SCAD security run ppl off those bridges**
"Hotlanta" by James Duckworth -- taken on the Jackson St. Bridge
http://www.flickr.com/photos/44124573@N00/2092105665/

6. Midtown Classics-- Skyline with Varsity in foreground // Fox Theatre // World of Coke // Centennial Park


Followers